Project 4
In this project, I optimized over the features of the pretrained VGG-19 network to synthesize images. Optimizing over the features alone allowed me to reconstruct the source image from its features, while optimizing over the Gram matrix of these features allowed me to create new images with similar local texture to the input without the global structure. Combining these loss functions with a different images for content and style, I'm able to perform style transfer from the style image to the content image.
Content Reconstruction
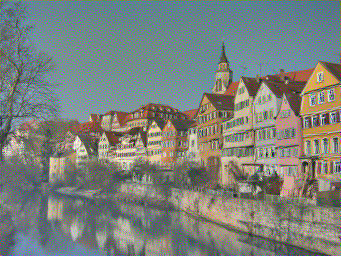
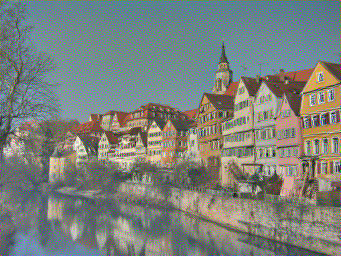
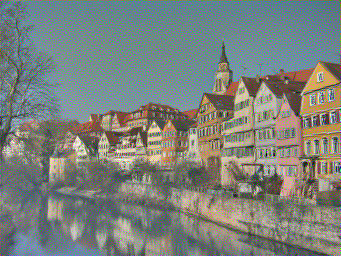
To start, I tried using the VGG-19 network to reconstruct a given content image. The procedure is fairly simple: I just use the convolutional layers of VGG-19 to compute feature maps for the content image, then optimize a random noise image so that its features match those from the first image. All of these operations are differentiable, meaning I can solve for the reconstructed image by using the LBFGS optimizer.
One hyperparamter I had to mess with was which features I used to compute the loss of my reconstruction, and as can be seen below, here are a few of the results I was able to achieve by using features from different layers. In general I noticed that the layers toward the input side of the network tended to produce better reconstruction, whereas deeper layers would give a more abstract reconstruction. This makes sense though, as the earlier layers have less convolution operations between them and the input, and the deeper layers in the VGG-19 architecture start to be downsampled. This means that by the time we reach the deeper layers of the network, a lot of information about the input image has been lost.
| Conv 1 | Conv 5 | Conv 9 |
|---|---|---|
 |
 |
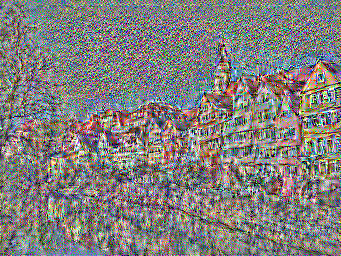 |
Of the three layers tested, I found the fifth convolutional layer's results to be the most visually interesting since it still preserved some of the original image without looking quite as noisy as the ninth layer. Below are a few more images generated with this layer on different noise inputs. Overall the reconstruction is largely invariant to the noise.
| Noise 1 | Noise 2 |
|---|---|
 |
 |
Texture Synthesis
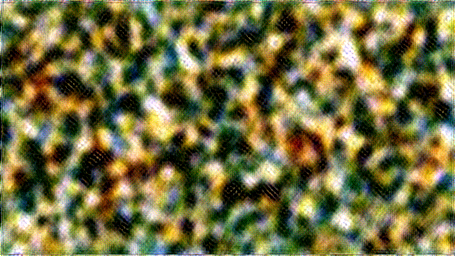
The next to style transfer after being able to reconstruct an image is to be able to synthesize the texture we would like to copy from our style image. To do this, I used a very similar technique to the content reconstruction step, except here the loss is computed over the Gram matrix of feature vectors rather than the vectors themselves. This means the optimization now no longer cares about the spatial position of a feature, just the image-wide correlation between the features. In a sense, this loss lets us "ignore" the large-scale content of the image while preserving the small-scale texture.
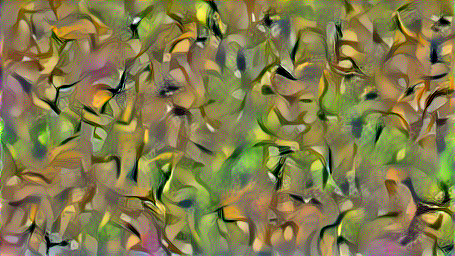
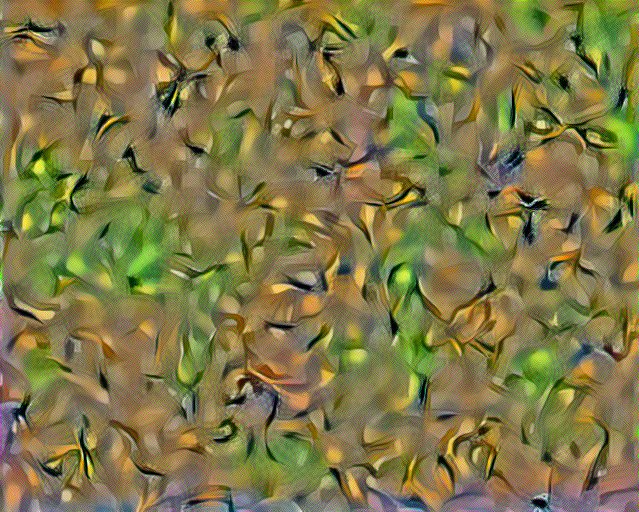
Like the previous section, I tried running my optimization with the features from various layers in VGG-19. Below are some of the results I got with different convolution layers. Note how in the early layers, the texture is very local bright colors without much large scale structure, but as the model starts factoring in deeper and deeper layers, the texture colors get a bit more muted, and larger scale patterns like leaves and eyes begin to emerge. This makes sense considering the later convolutional layers operate on a downscaled image, and therefore their kernels effectively cover larger areas of the input image.
| Conv 1 | Conv 1-5 | Conv 1-9 |
|---|---|---|
 |
 |
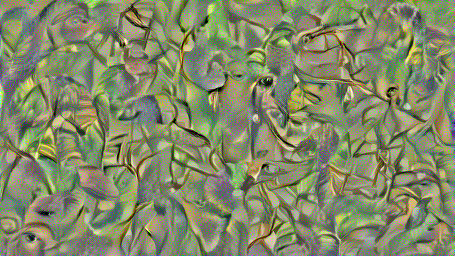 |
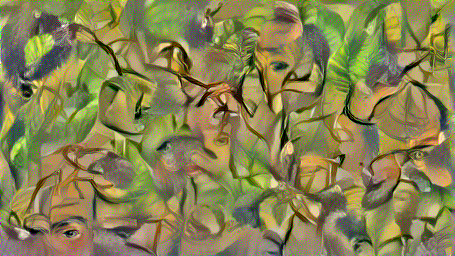
From the above, I really liked the look of the first nine convolutional layers since it had a visually interesting and surreal pattern of faces merging into leaves. I increased the iteration count from 300 to 1000 to try and get less noisy images, and generated a few more textures based on random noise.
| Noise 1 | Noise 2 |
|---|---|
 |
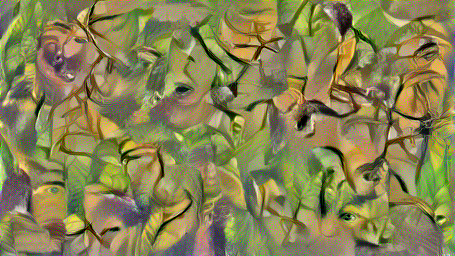 |
The two generated textures do look fairly similar, since both appear to be lifting segments from the source image. You can see that the different noise initializations do create unique images though, as the patches appear in different locations between the two textures.
Style Transfer
Finally, to do style transfer, I combine the style and content losses from the given style and content images, and optimize over those. In my case, I found that using the first five style layers and the second content layer tended to give results which kept the texture from the style image without losing too much structure from the content image. Generally, a style loss weight of 1,000,000 with a content loss weight of 1 produced decent images, though different style images sometimes could use more or less weight depending on how much the style image overpowered the content. Using 300 optimizer iterations, I generated some of the images below.
 |
 |
|
|---|---|---|
 |
 |
 |
 |
 |
 |
 |
 |
 |
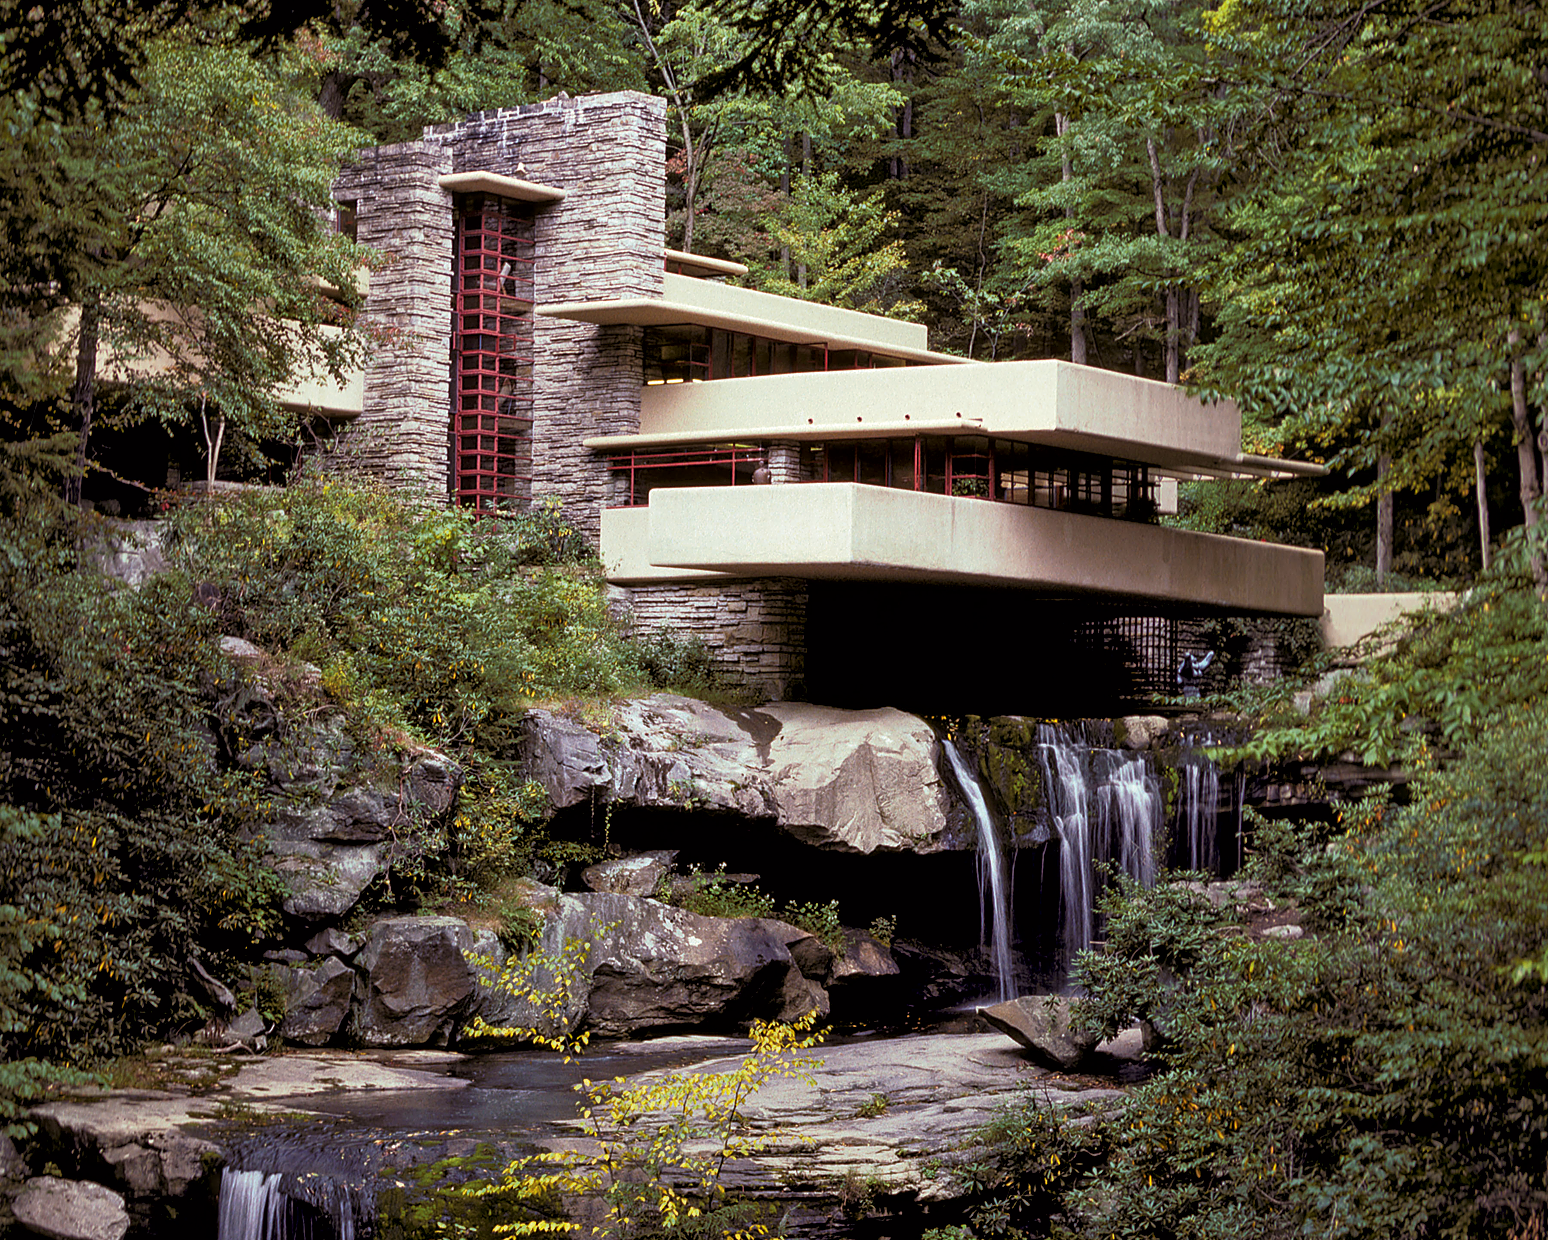
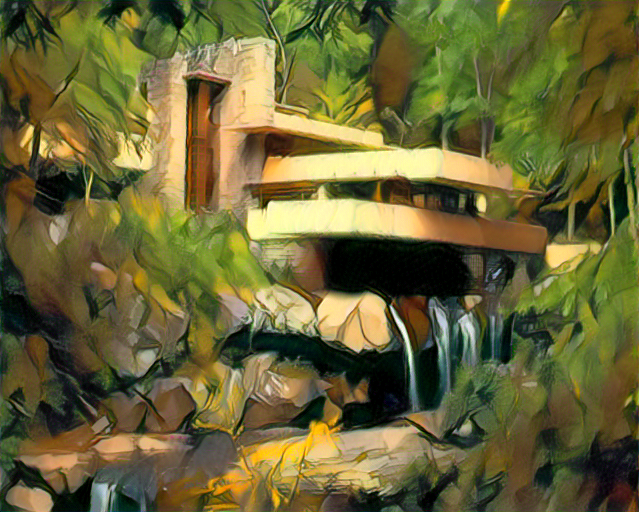
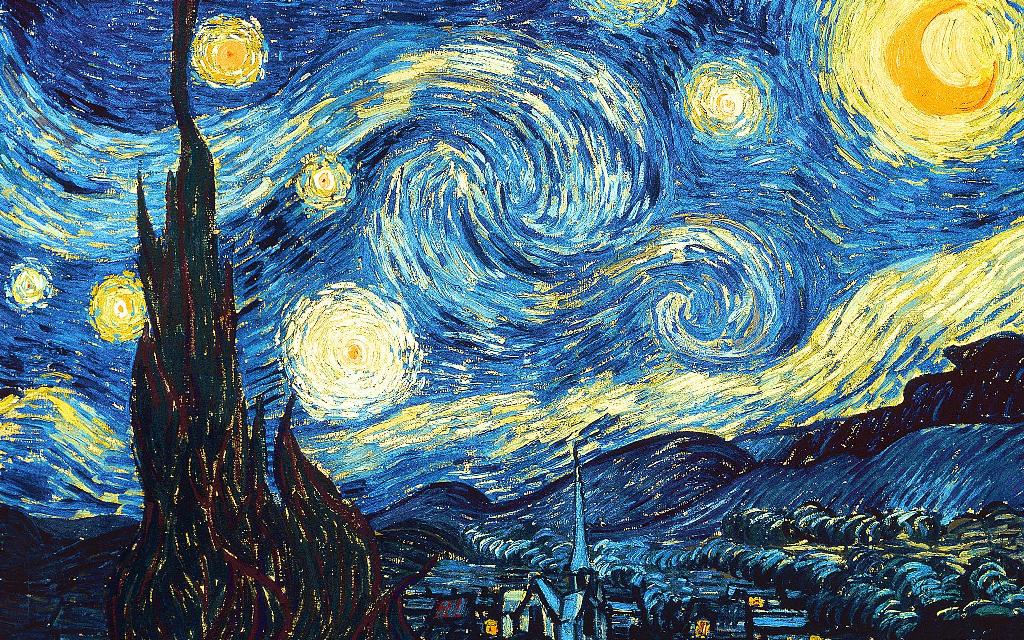
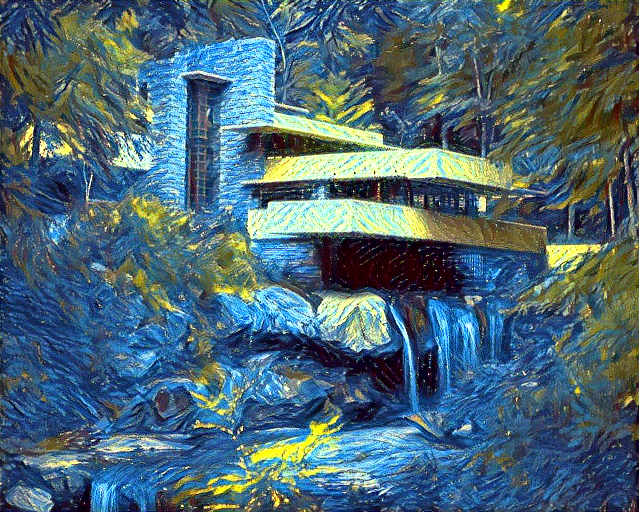
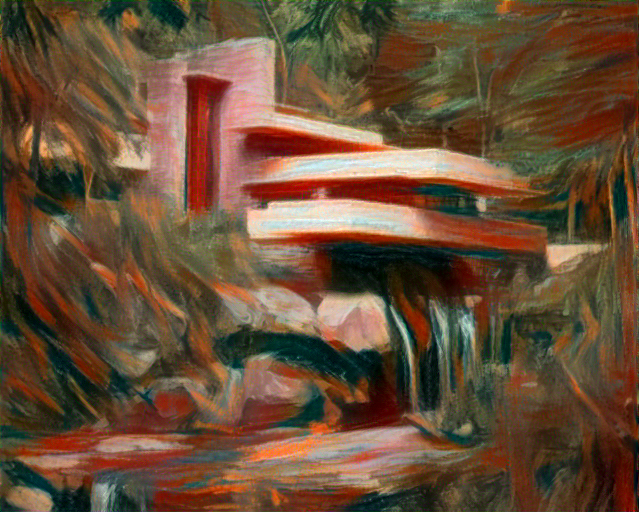
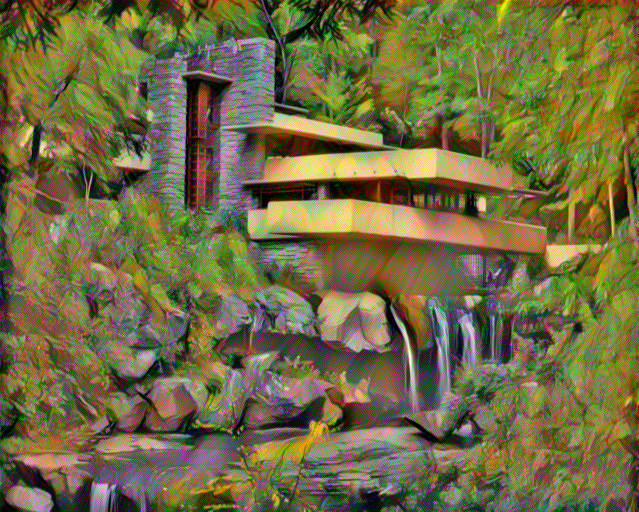
Altogether I think these results look pretty good. It is worth noting though that the best results were achieved where the content image and style image had similar color palettes. Because I include the earlier style features, the style loss tends to penalize colors which don't appear in the style image, which can lead to some unnatural recolorings of things in the content image. Images like the Starry Night Falling Water example may produce visually compelling output, although the result doesn't very strongly match the original content in more than geometric structure.
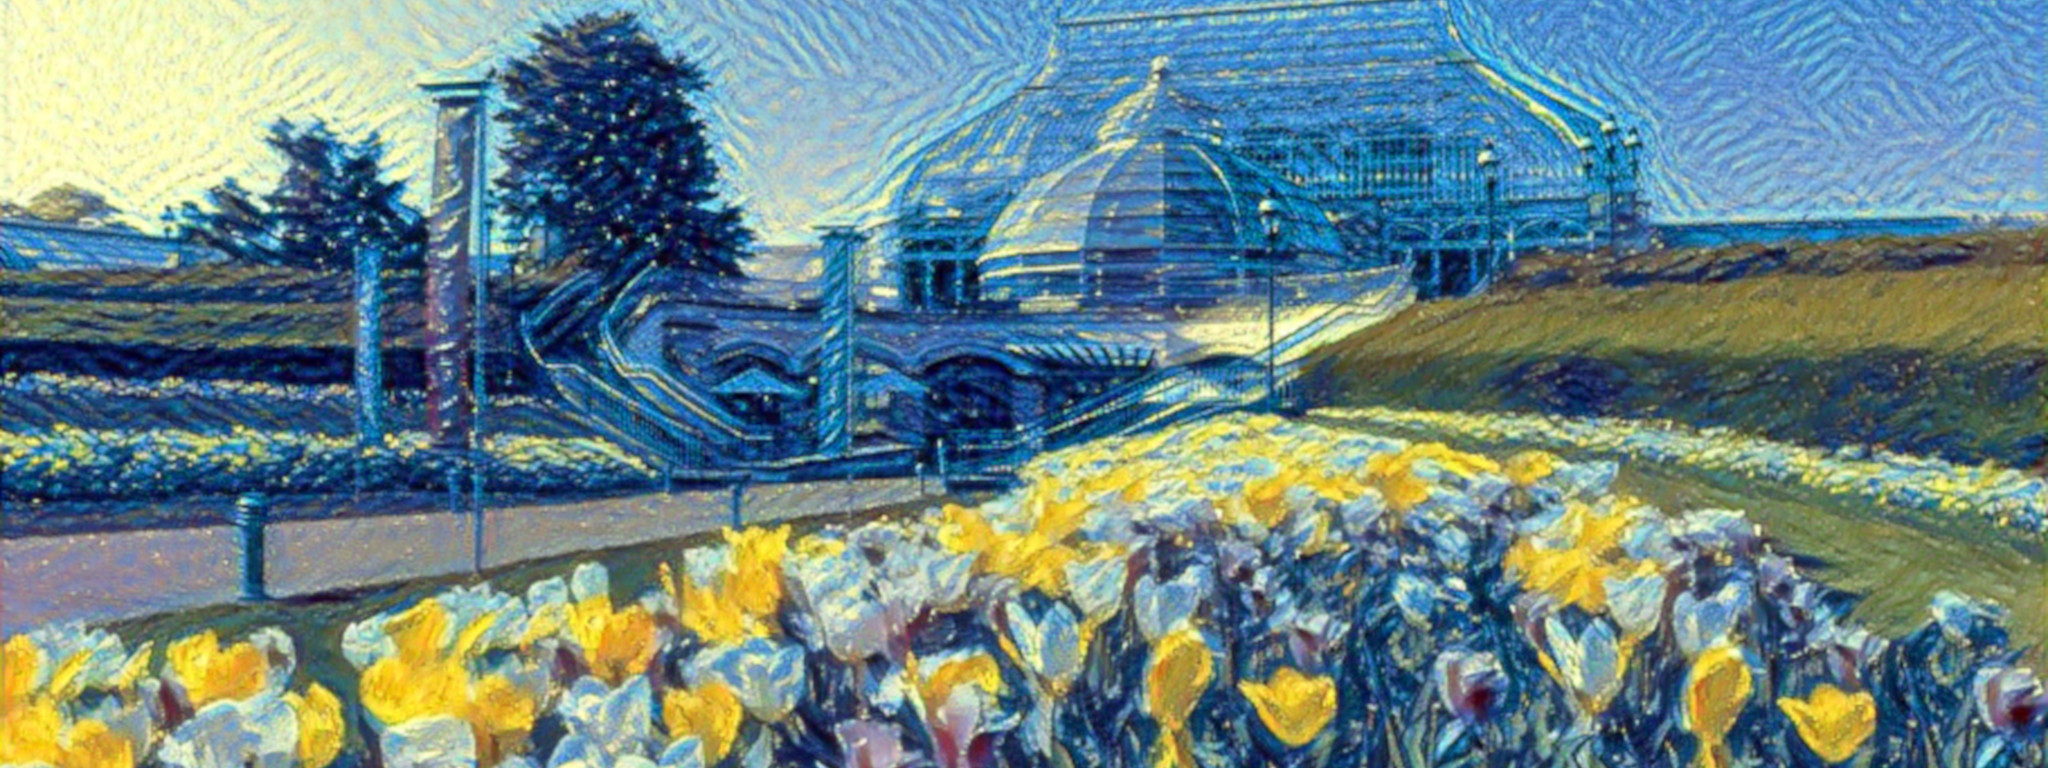
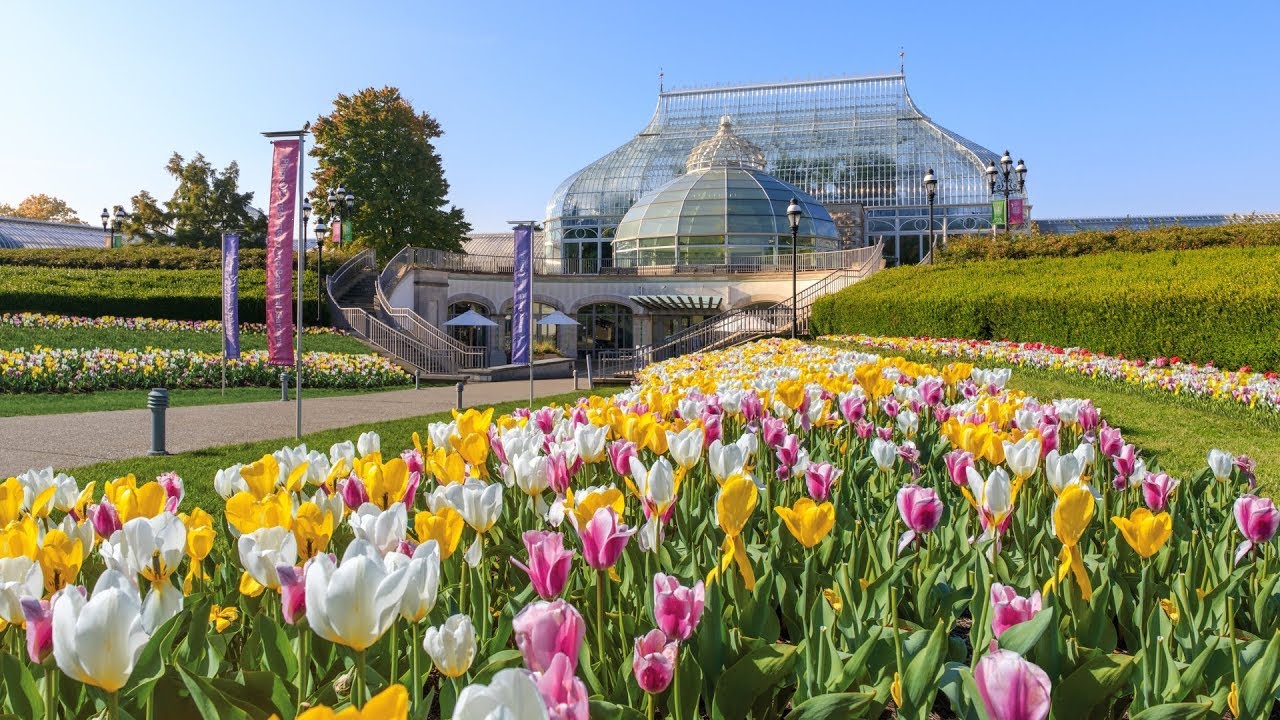
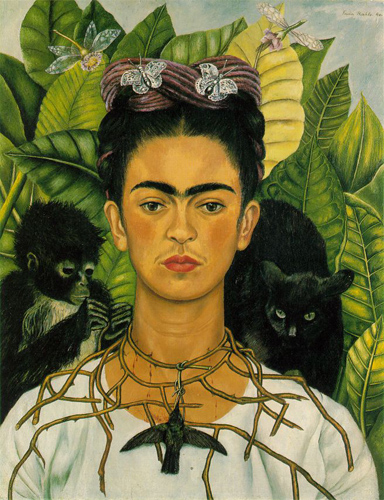
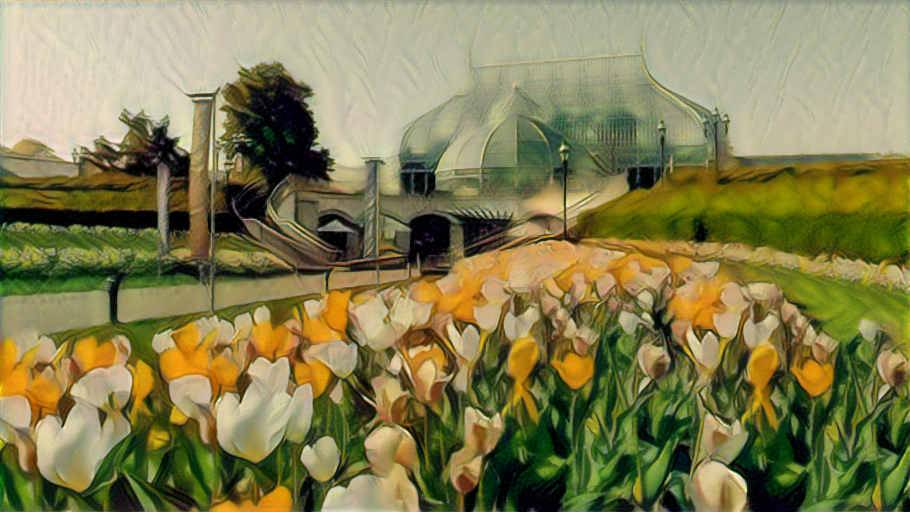
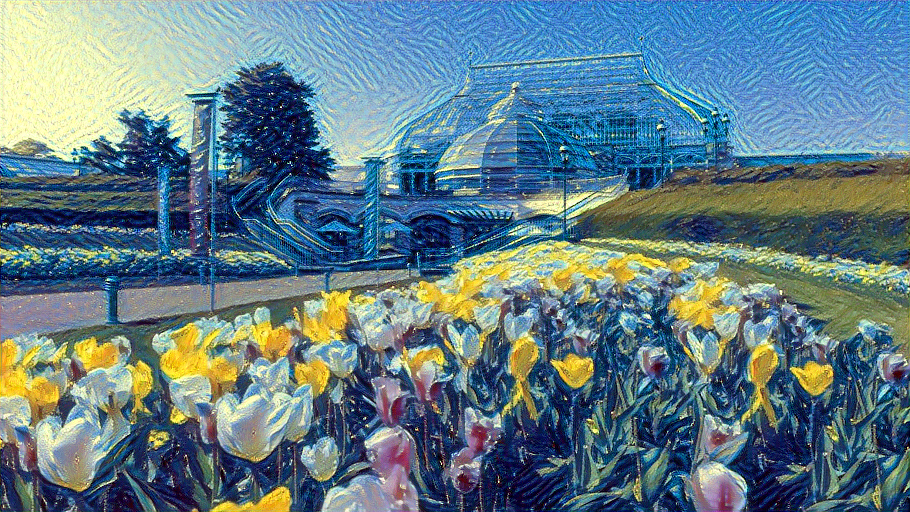
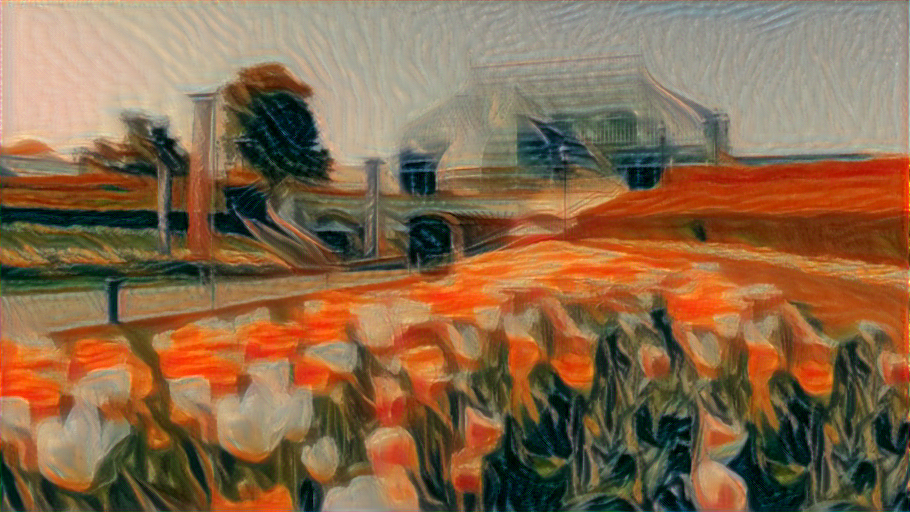
In cases where the color palettes are matched well though, results like the Frida Kahlo Falling Water or Starry Night Phipps images look really good. Especially in the Phipps case, you can see how the brushstroke textures from the Van Gogh painting are carried right over into the new image.
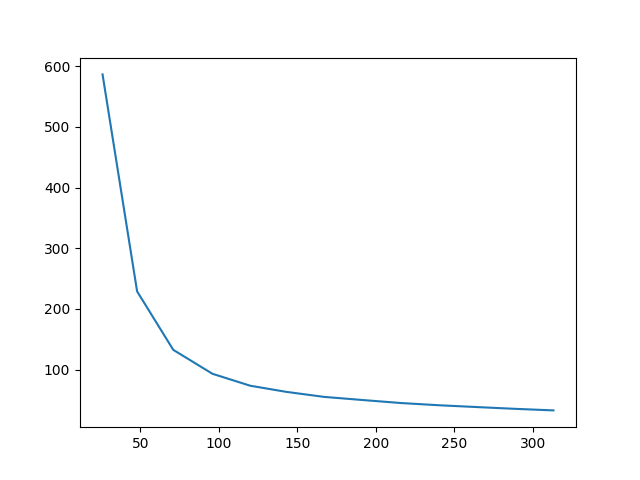
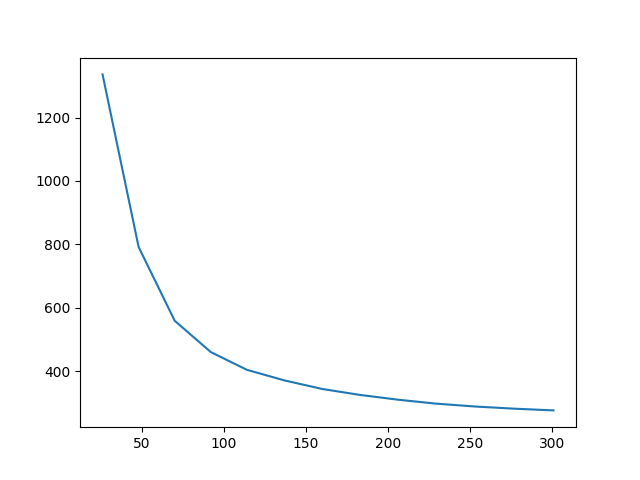
All the above images were generated by initializing the optimization with the original content image, although in the other sections I started from random noise. I can also start from random noise for this optimization. In fact, the results below show the difference in output after 300 iterations, as well as the loss over time.
| Noise Initialized (Content 1) | Noise Initialized (Content 100) | Content Initialized |
|---|---|---|
 |
 |
 |
 |
 |
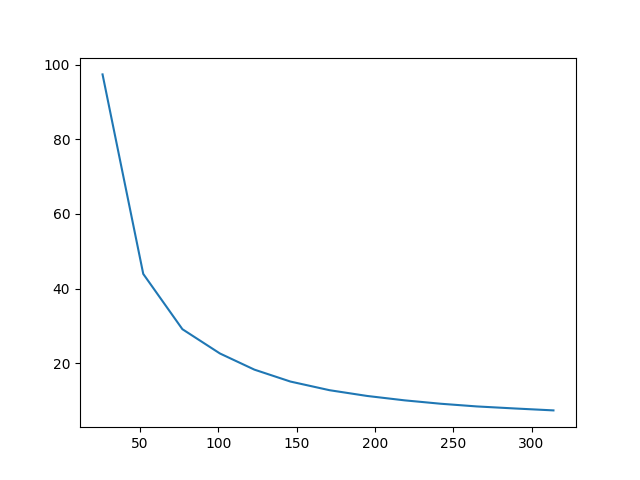 |
I noticed that the leftmost image, initialized with noise and using the typical content loss weight didn't really capture any of the content image. The middle image is the result after I turned the content weight up to 100 times what it was originally. Overall, you can see that initializing with the content image does preserve the content better than trying to optimize towards it from a noise image. Additionally, the noise image initialization had a higher starting loss than the content image, and after 300 iterations the loss converged to a larger result.
While it is less sharp compared to the content-initialized image, I do somewhat like the look of the middle noise initialized image. It feels a bit more between the content and source images, and looks like it has a bit better color contrast and sharper details.
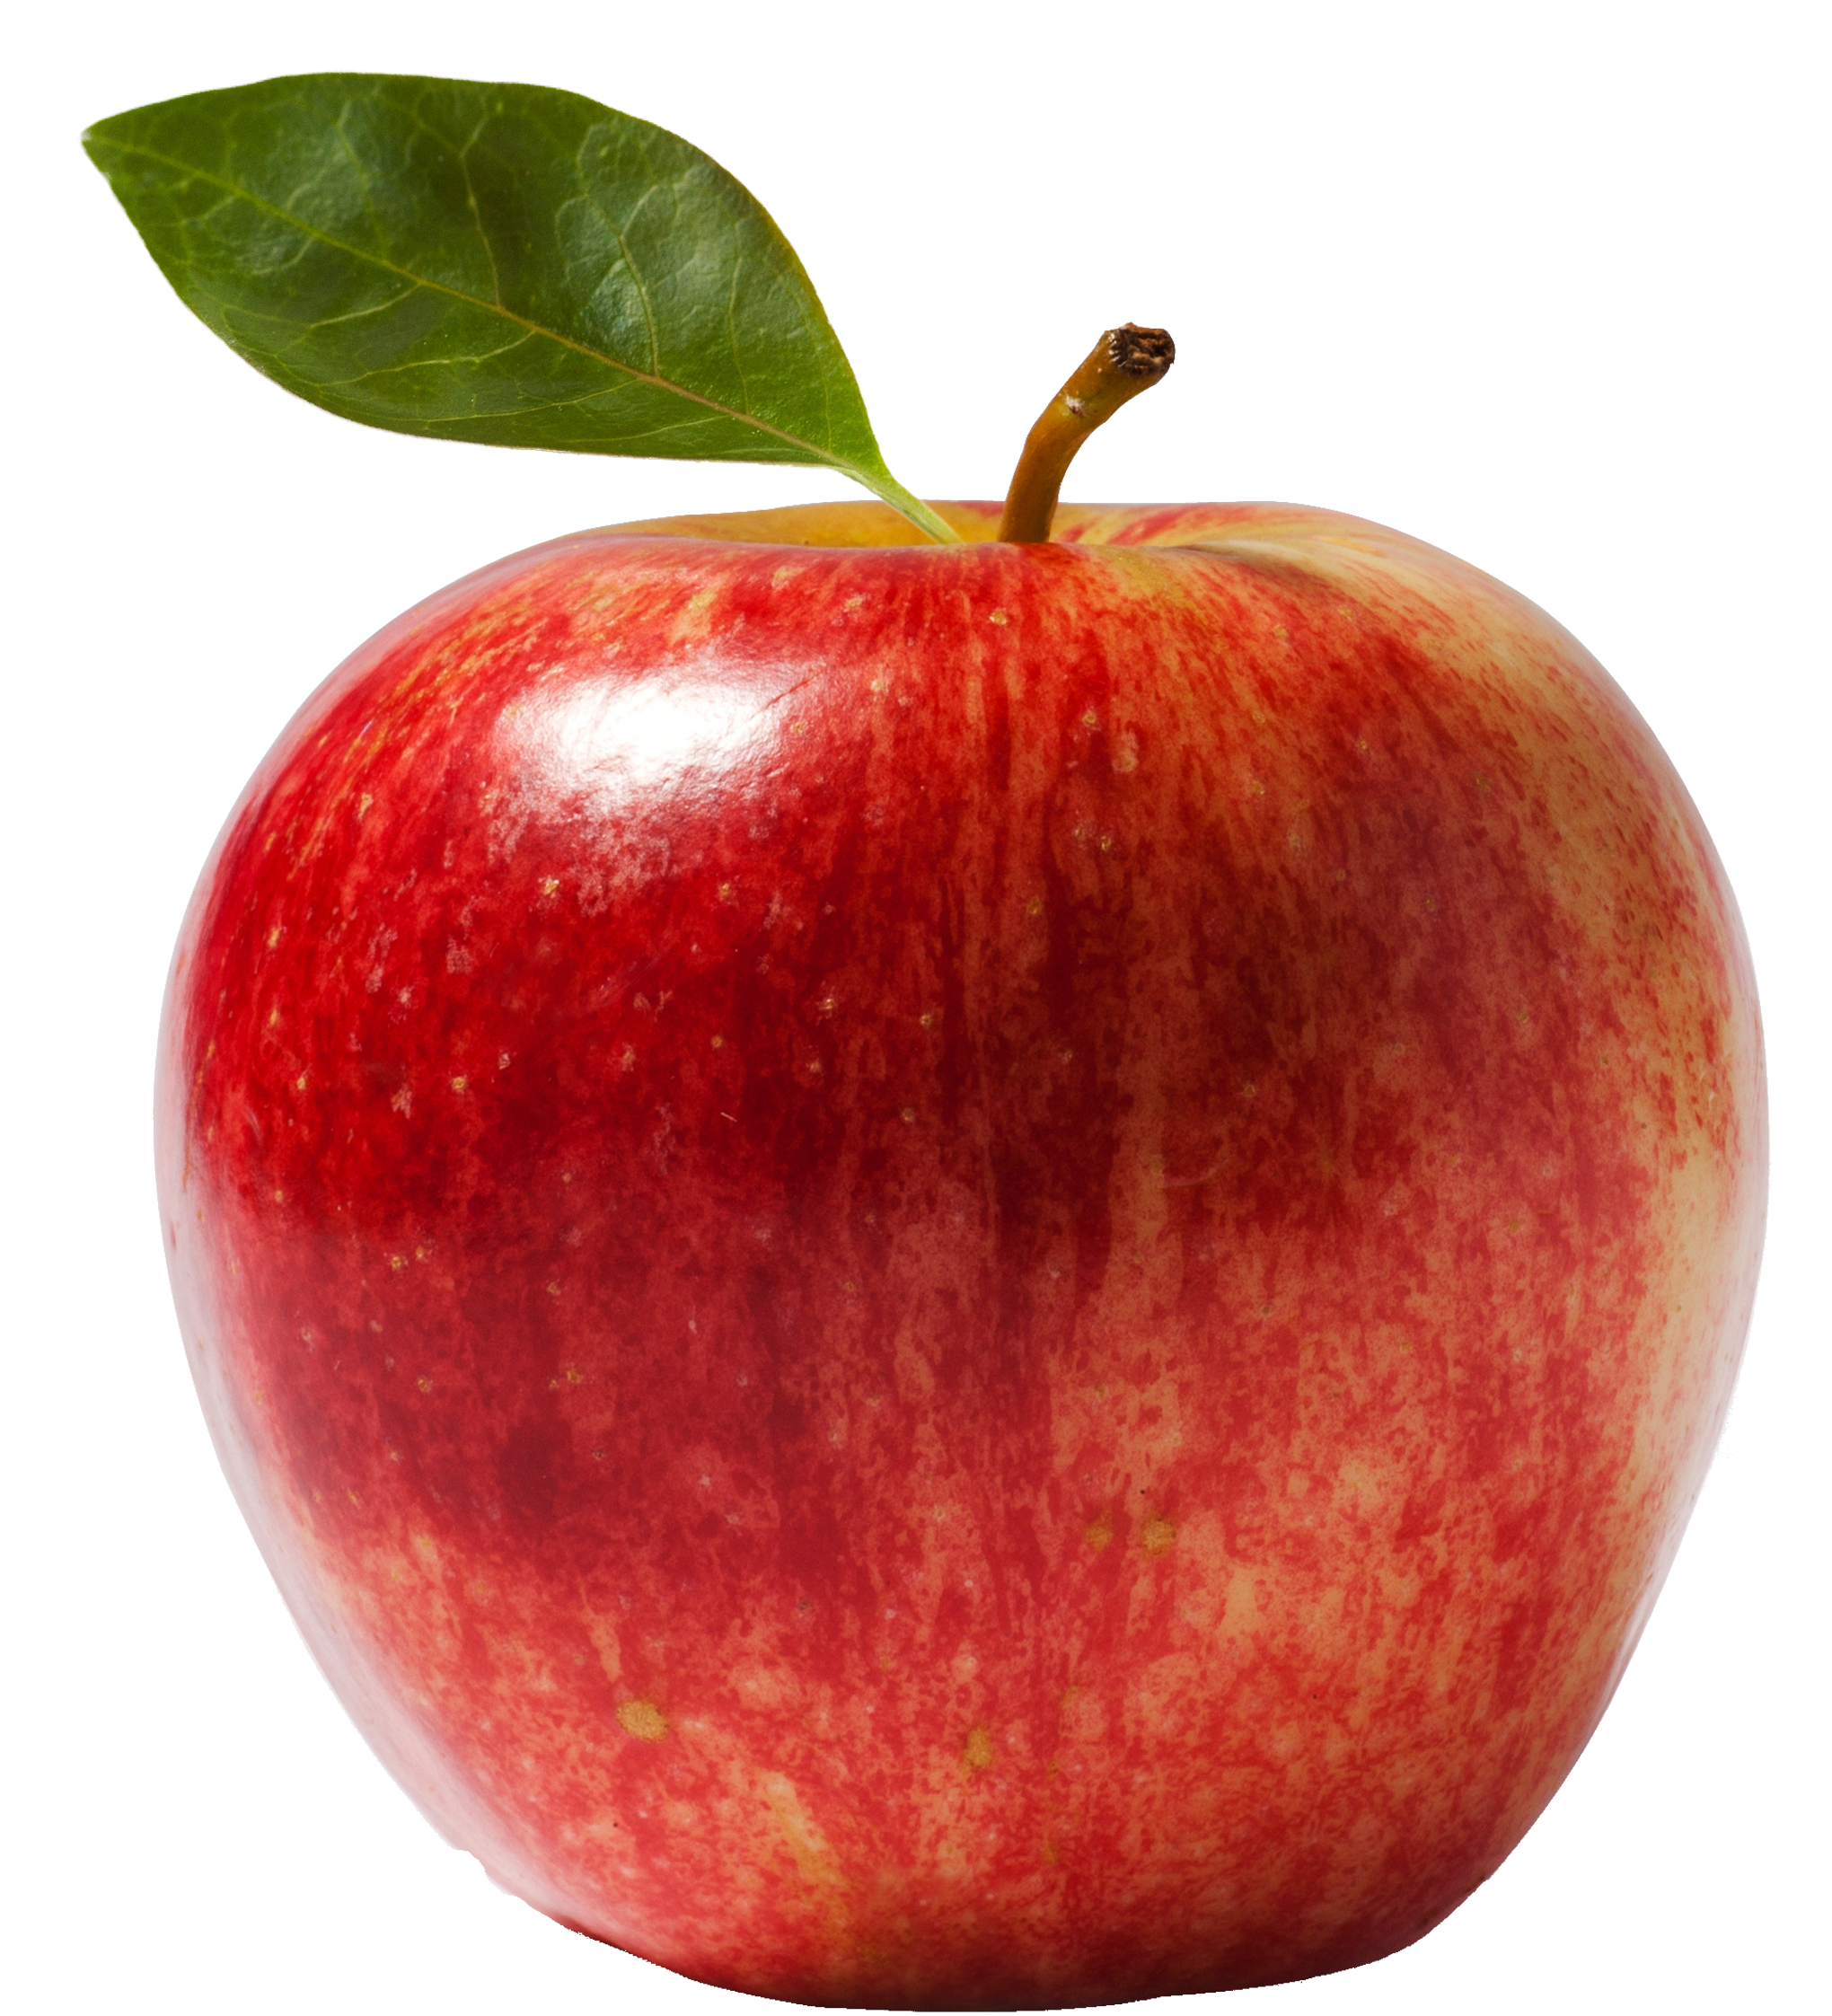
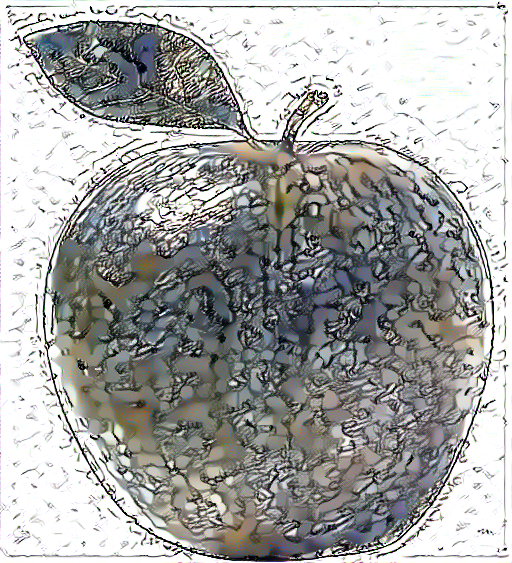
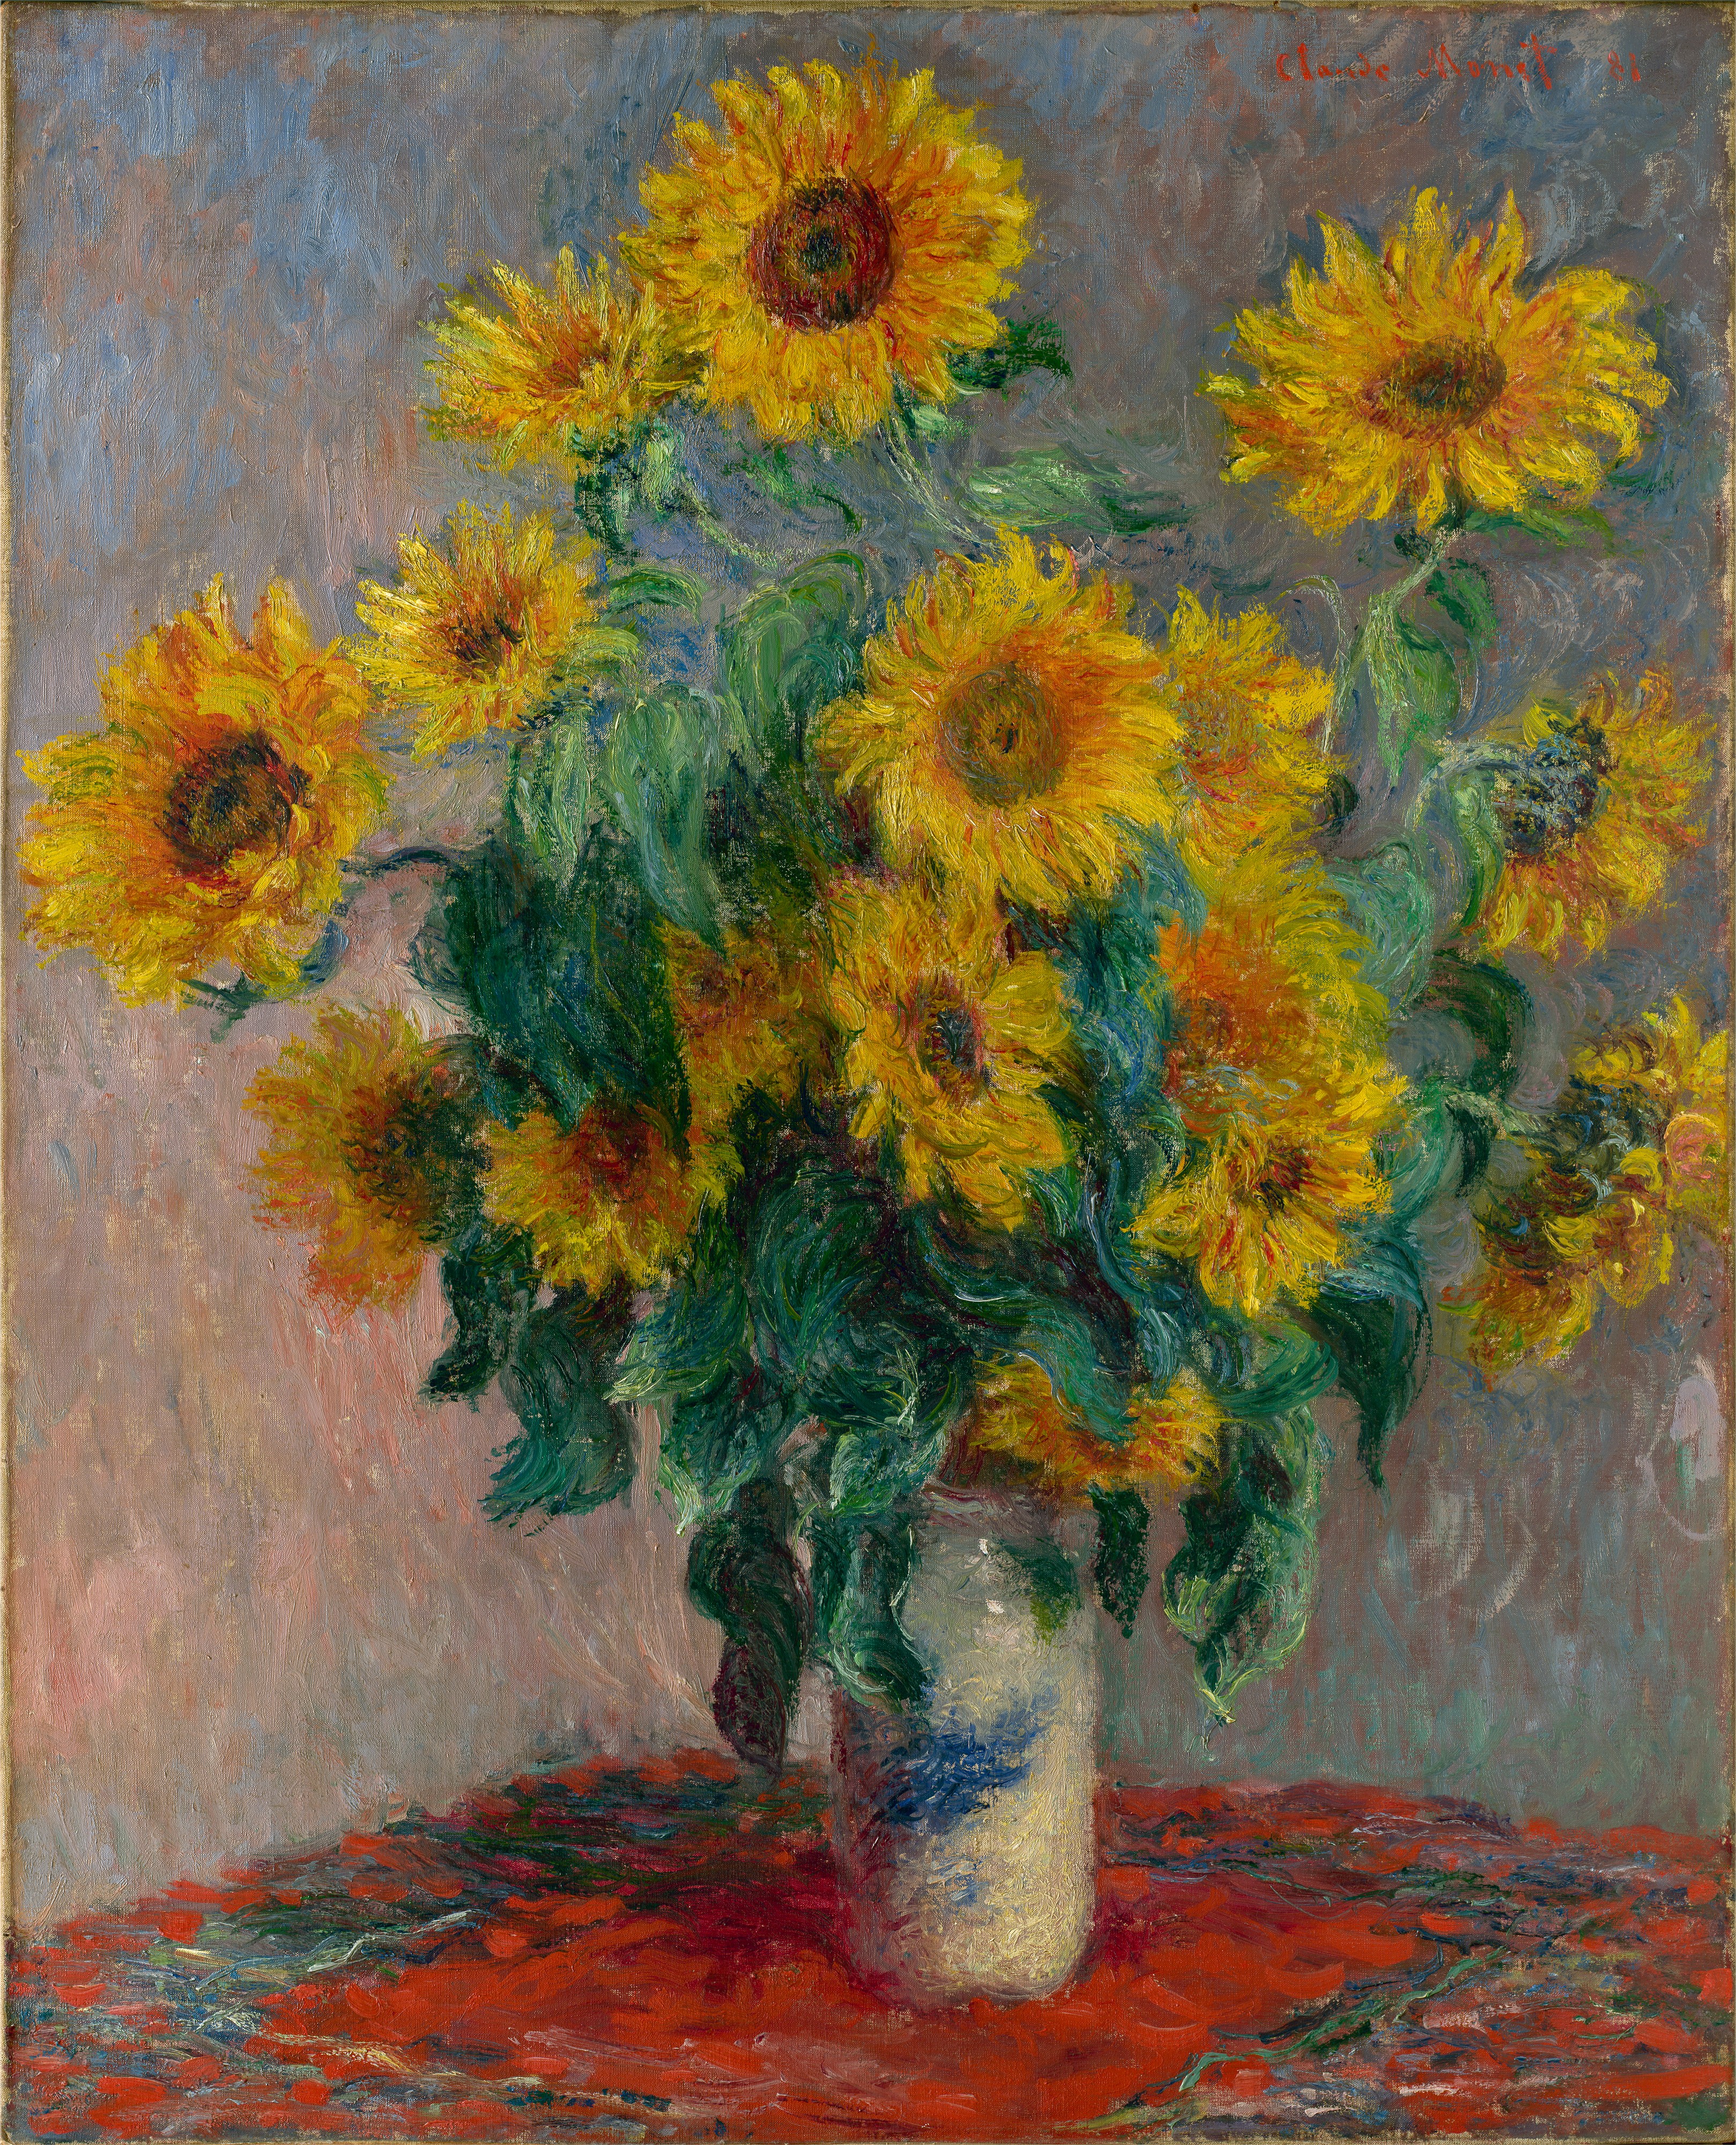
To finish up, here are some more style content combinations I was able to try with this system.
| Style Image | Content Image | Result |
|---|---|---|
 |
 |
 |
 |
|
 |
I think the most interesting result here is the apple image. Going from a color image to a monochrome sketch is definitely difficult, and the result doesn't look perfect. In some sections though, like on the leaf, you can see the beginnings of some sketch scribbles to shade the surface in. I can only imagine with more training time that the grey splotches would go away in favor of a sketchy drawing of an apple.
I also tried stylizing the Falling Water picture using my favorite Monet painting. I don't think the results were very good for the house, though I do like the look of the brushstrokes used to fill in the trees in the background.