NS Workbench: A Graphical User Interface for NS Network Simulator
l Installing NSBench
1.
Download NS and NAM
2. Download NSBench
3. Download and install
Java 1.4 or later.
l Using NSBench
1.
Start
nsBench by double clicking the nsBench.jar
icon in windows Explorer. In unix
and linux, open x terminal, then type “java
-jar nsBench.jar” to start nsBench.
2.
Use
the top menus to save files, set NS global configuration and generate the TCL
script. Use bottom menus to create NS objects.
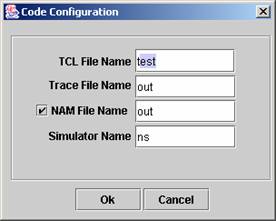
3.
Choose
your file names for the simulation project. Open <Configuration> menu and
choose <Trace>.
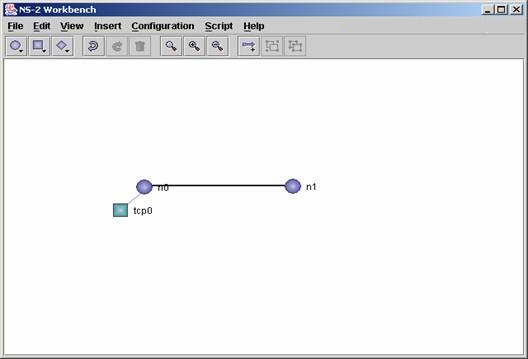
4.
Create
network nodes. Click the circle icon, or select the insert menu and select
<Node>.

5.
Create
a network links. Click and drag the mouse from the point on the center of one
node (cursor changes to hand) to the center point of the other node.

6.
To
configure the created link, double click the mouse on any point on the link.

7.
Attach
transport agents to nodes. To attach an TCP agent to a
node first select the node. Then, open the insert menu and select <TCP>,
or click on the square icon and select the agent.
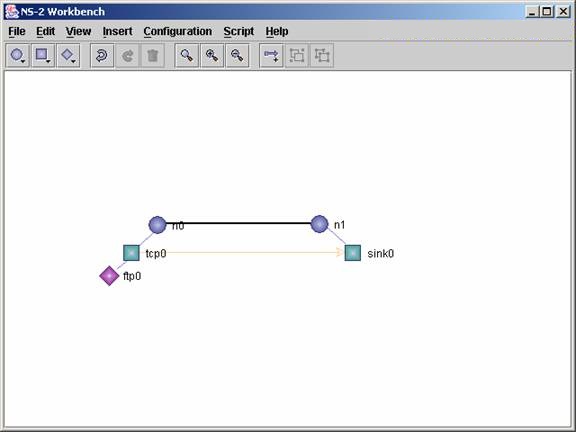
8. You can now create a sink agent and
connect it to the other node. To do that follow the same steps as in step 7,
but select n1 prior to starting.

9. To configure the TCP agent, double click on the TCP
object.

10. Create a
transport connection between the two TCP agents by connecting the center points
of both TCP objects.

11. Create
application or traffic generator objects. To create an FTP application object,
first select the source TCP agent to which this application will be attached,
then open the insert menu and choose <FTP>, or select the Diamond shape
icon and choose one of the applications.
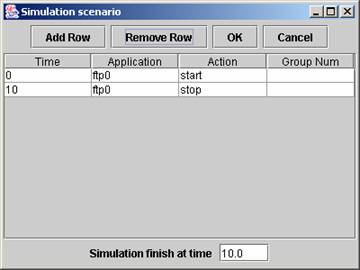
12. Write the simulation scenario. Open
<Configuration> menu and choose <Scenario>. In the scenario window,
click <Add Row> button to add an event in the scenario table. Type the
time the event should be triggered in the <Time> slot. In the
<Application> slot, choose the FTP application object. In the
<Action> slot, choose “start”.

13. Complete
the simulation scenario by adding more rows. Finally, write the total
simulation time at the bottom.
14. Generate the NS TCL script for your simulation
project. Open the Script menu and choose Generate. The generated code will be
stored in the TCL file named in step 3.